

Demo 4: lo-fi printmaking
With this minimal-fuss printmaking method you get to embrace all the flaws. In this video I encourage you to layer up and take inspiration from 50s & 60s designs by Stig Lindberg.
As you probably know, I started my journey as a printmaker and love processes like this simple “monoprinting” technique.
There’s a misconception that you need a lot of equipment and knowledge for printmaking. Not necessarily so…
It can be done at home with the right bits and pieces. Or you can go pro with gel plates – I’ll suggest a shopping list for both.
Before we kick off, another welcome to recent subscribers – Carol, Clare, Sharon, Helen, Laurie, Gill, Lucy and Vicky among others. It’s so great to have you on board and please do share KTC with your friends if you think they might enjoy this space.
Peel and reveal
No, we’re not talking facemasks here. The real magic of printmaking is that breath-holding moment when you peel back your paper from the “plate” underneath to reveal your print.
This is all about happy surprises and discovery
The materials list below is straight forward but quite long. As usual there’ll be affordable options alongside the posh stuff, in case you want to continue with monoprinting at home as your primary art practice.
I’ll share a bit about Stig Lindberg too.
kitchen table creatives is a reader-supported publication:
Materials
copy paper, tracing paper and wallpaper samples or offcuts – also artist’s wet-strength tissue paper, very lovely to work with if a bit fiddly
a smooth-sided glass chopping board or piece of reinforced glass – you can also get into gel plates specifically for monoprinting (perfect gift request?)
a piece of mount board or card for backing
transparent hobby glue or rice paste and a water spritzer
acrylic paint or tester pots of house paint – if you’re going to do lots more the best brand of acrylics to use is Golden Open acrylics as they’re slow drying
intaglio inks (eg Akua brand) are optional – these are great for drawing into for as long as you like but quite expensive
4b pencil (or a chunky graphite stick) and crayons – waxy or oil pastels
kitchen roll or similar
scissors
a roller or brayer – speedball do affordable ones or just a small DIY foam roller
a mix of random tools for reducing paint and inks on the glass – lollipop sticks, makeup sponges, ear buds etc
Demo: printing up delicious (50s style) papers
“Have no fear of perfection – you'll never reach it.” – Salvador Dali
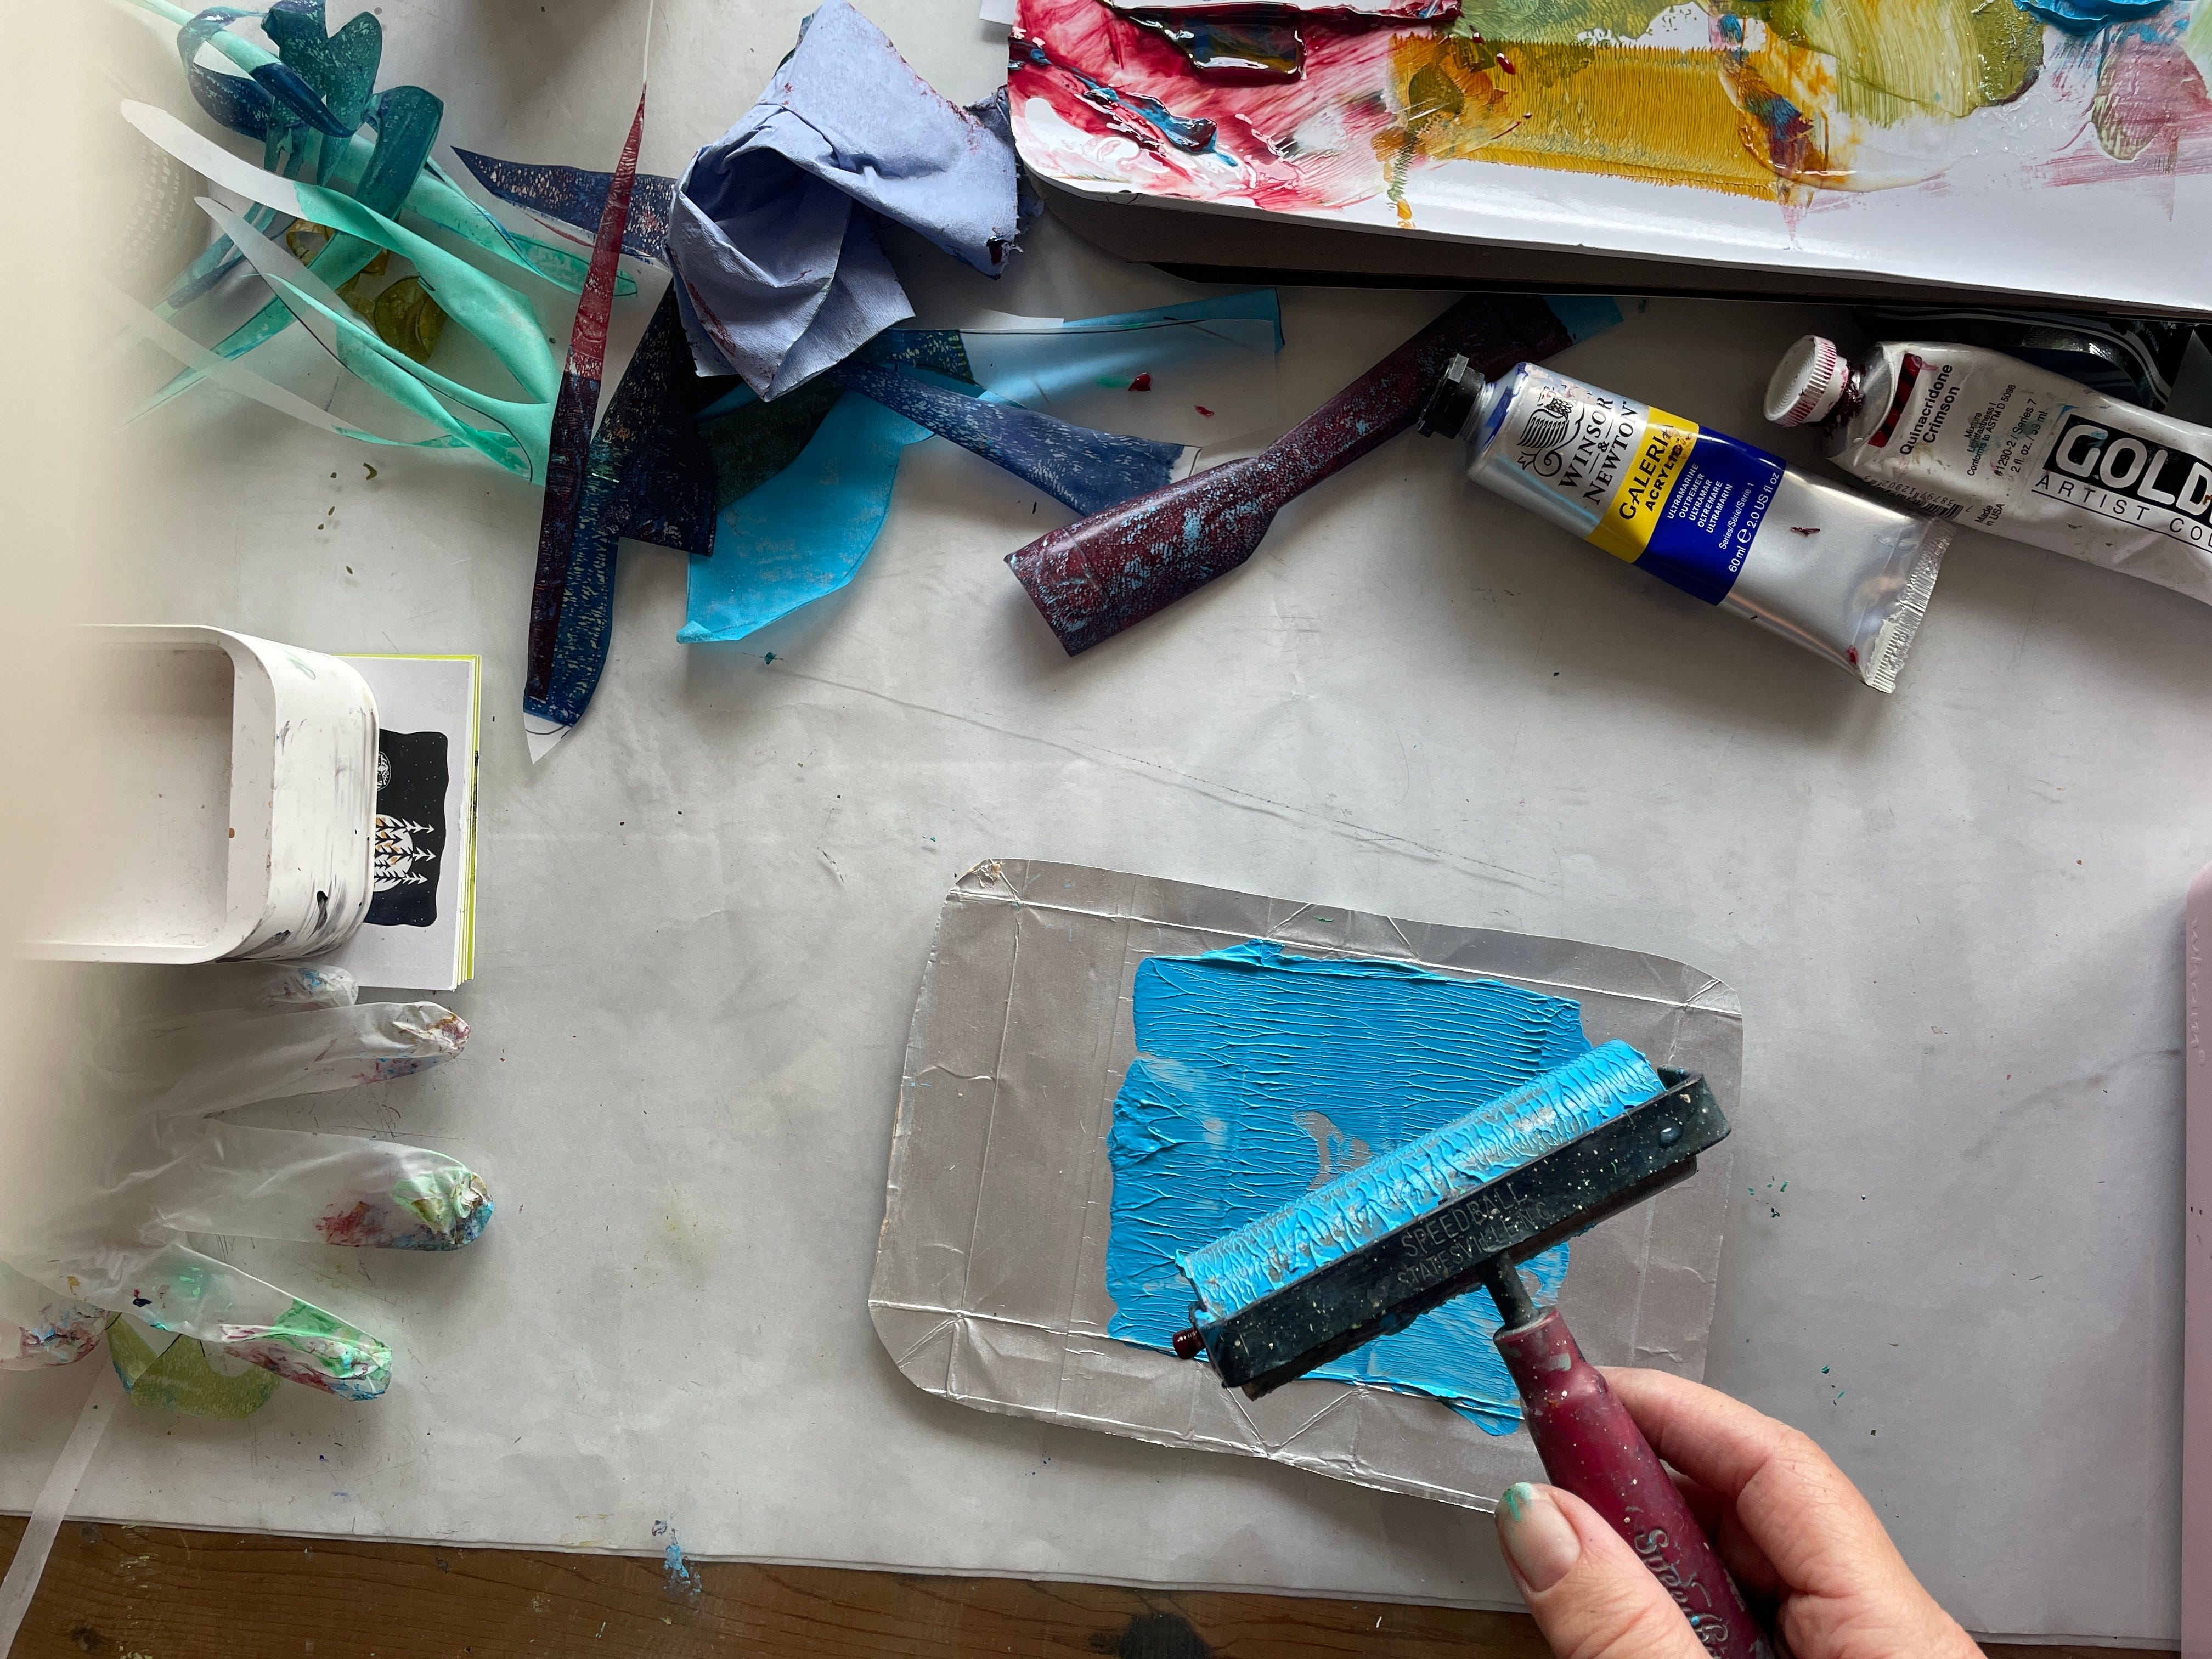
Start with setting up your glass “plate”. Have your roller, paints/inks, tools and kitchen roll to hand.
Make your monoprint papers in layers. Roll out a couple of different colours of acrylic paint. Take some plain impressions to create the first layer of base colour – you could use your kitchen roll up and down on the back of your paper.
Roll out more ink/paint. Make a series of marks into the surface. Take a second impression, rubbing a previous print ‘registered’ over the top.
Repeat with different layers of colours and different patterned marks into the plate.
Make stencils. Cut out some funky shapes from tracing paper. Then place these onto a layer of ink rolled on your glass or gel plate - this is a masking technique - and take an impression adding a different design to your papers.
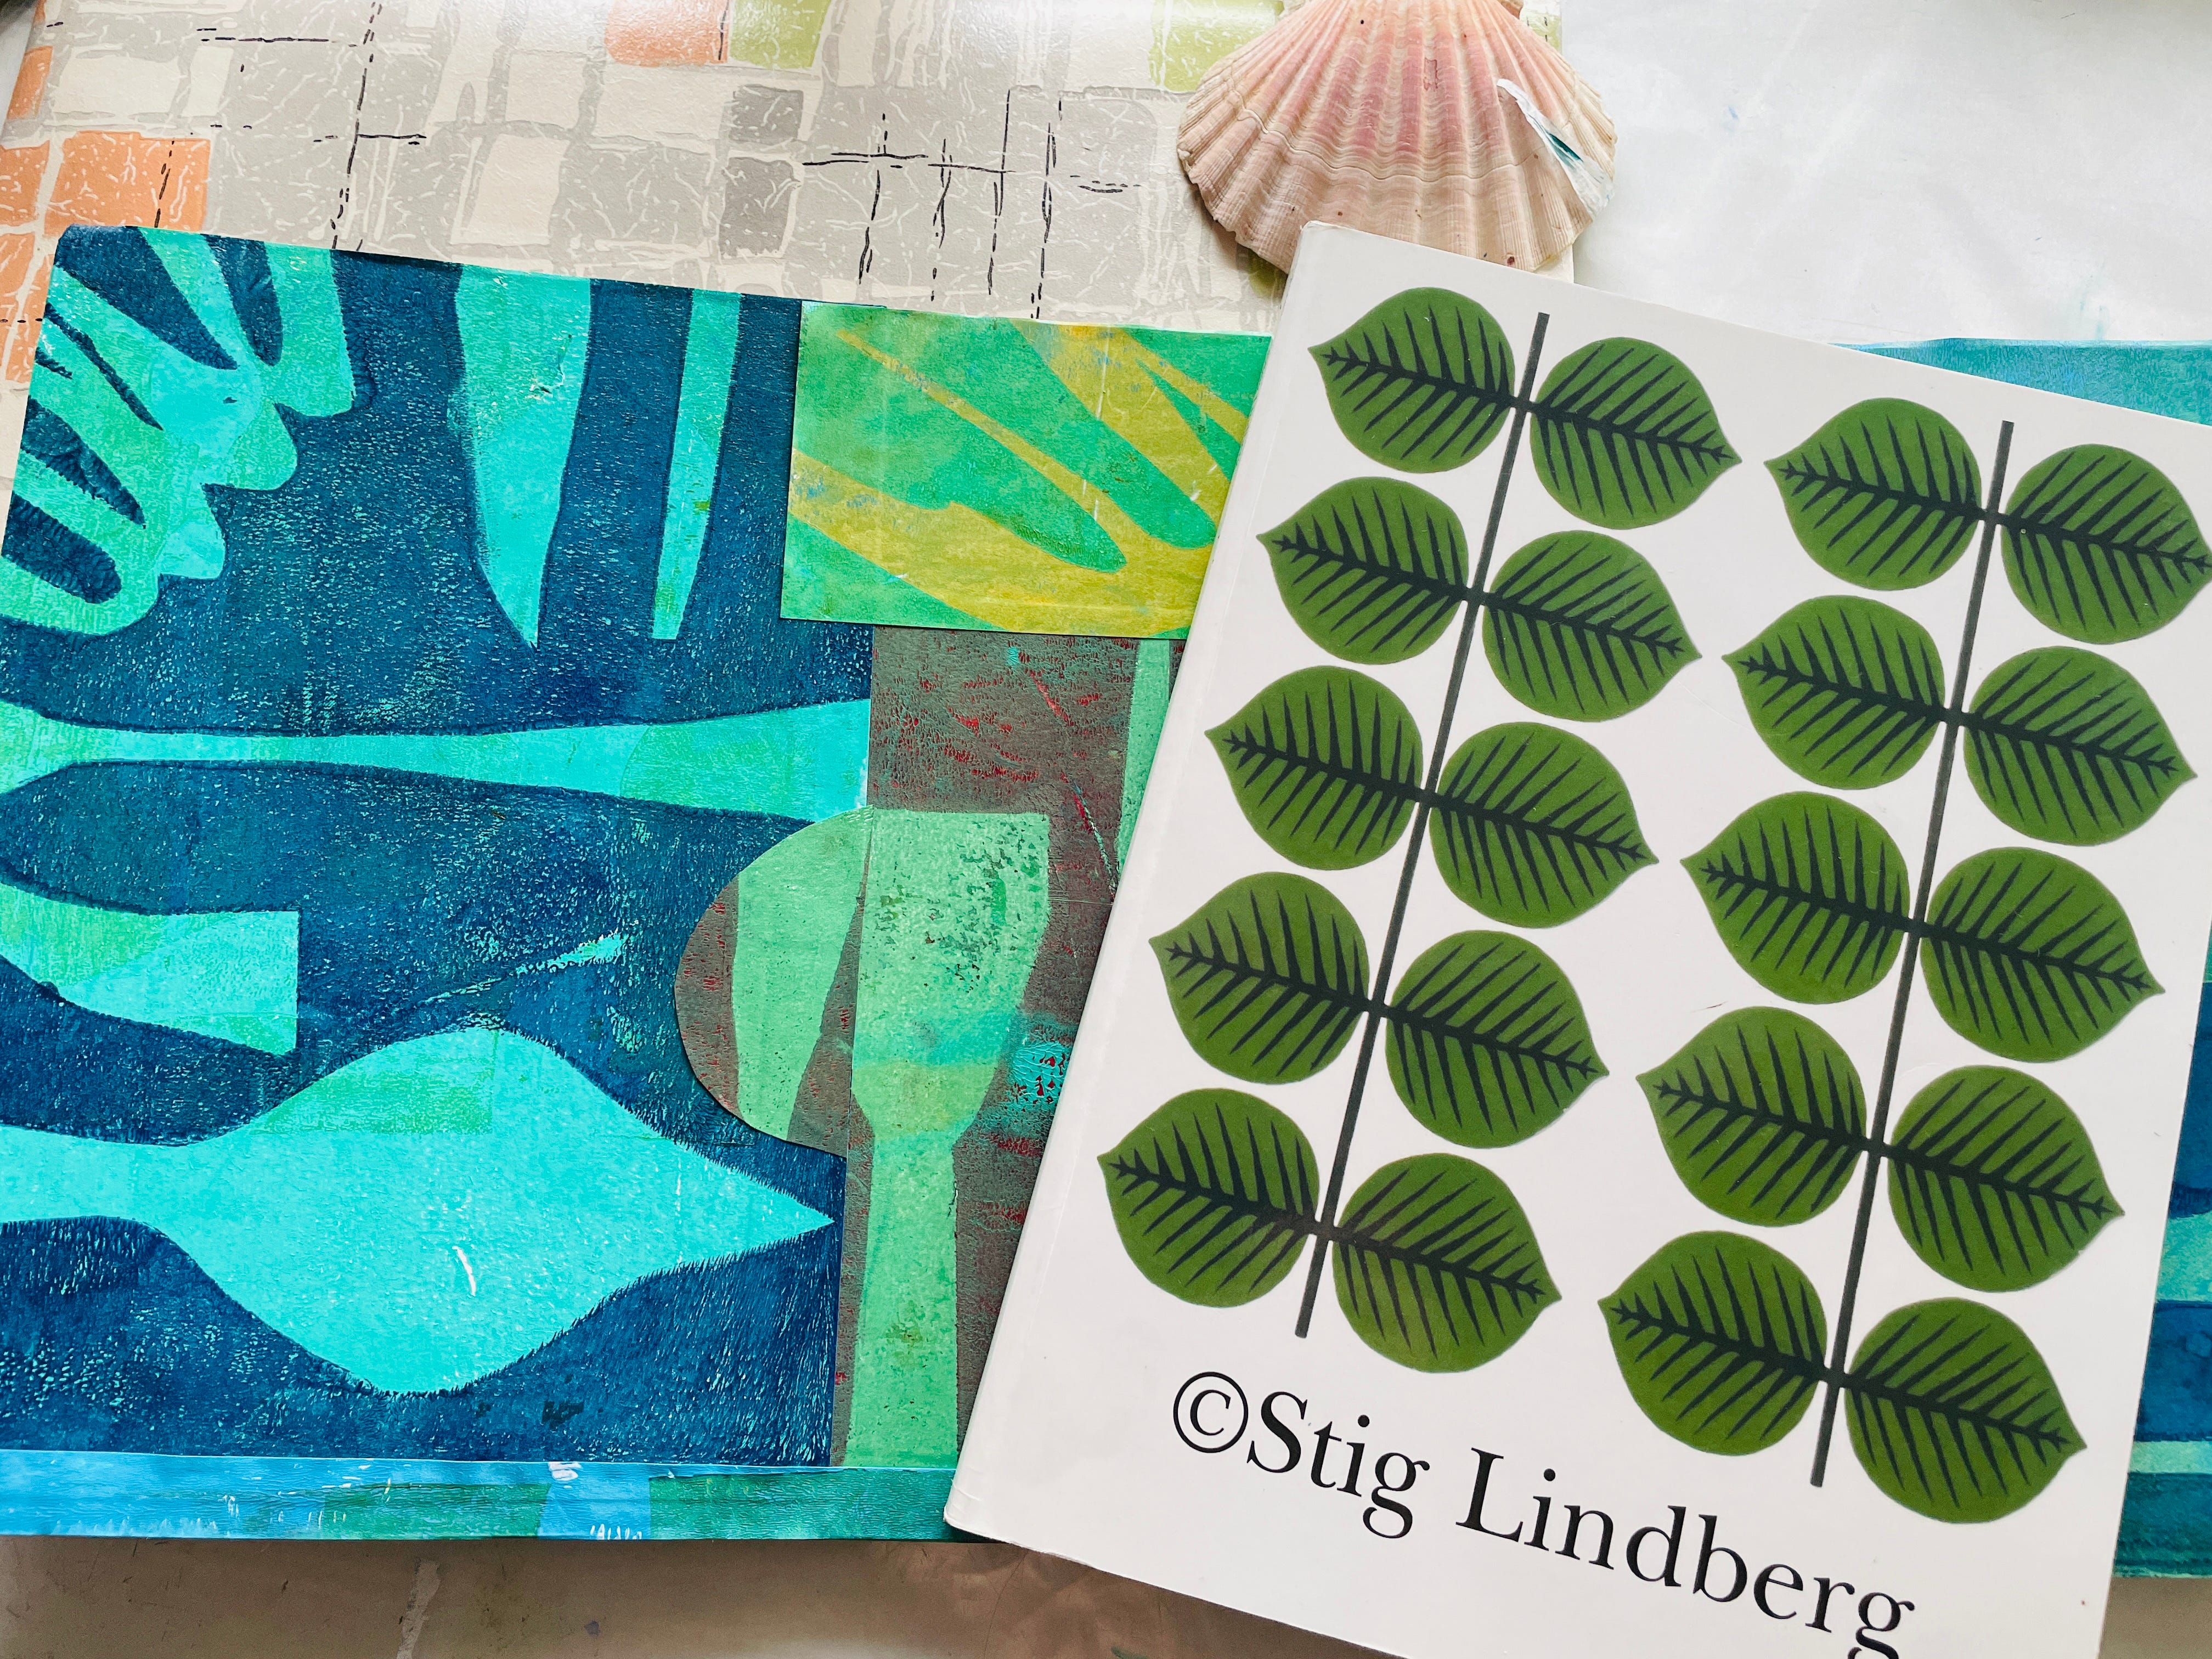
To make a still life image, trace over (or simply draw from your imagination) a group of vases. See what you can find in magazines or books at home for a source image? Cut each one out and cut around them from your dried papers. Then arrange the still life collage over a base sheet like a wallpaper sample or you could make a simple background painting.
Your stencilled papers are likely to work well as an abstract frieze against a long piece of mount board if you prefer.
A bit about Stig Lindberg
Stig Lindberg is considered the epitome of mid 20th century Swedish design. His ceramic and fabric collections invite us into a nostalgic world inspired by nature and folklore. Close to nature and powerfully simplistic, his fabric designs in particular pay homage to the garden of Eden. And his quirky pots, dishes and plates are sometimes slightly off-kilter and perfectly imperfect. They are often high contrast with smooth glazes over lots of texture too.
There’s always a kind of charm, whimsy and sense of play in a Lindberg object. His 'Karneval' series, with its unique and cheerful shapes and motifs, is like a kids’ party on porcelain.
He imbues clay with life and animation.
He used the sgraffito technique, scraping away at surface layers to reveal what lay beneath (just as we try to do when we reduce ink on the plate in this KTC demo).
He merged the boundaries between art and functionality effortlessly. The 'Domino' ceramics (produced for Gustavsberg) made for humble, everyday household objects that breathed beauty into domestic life – usually the kitchen or dining room, appropriately for KTC.
His designs speak of an artist who was individual and quirky yet created a universally appealing, enduring signature style.
Some ever-so useful links:
A great little book of 1950s vintage patterns by Marnie Fogg (don’t you just love her name?!)
Handprinted.co.uk blog - jam-packed with tutorials for all sorts of printerly methods, including monoprinting and gel plates
Next week I’ll be posting more food for [art] thought. I had a really positive response to my piece ‘on autonomy’ from Caroline (thank you!): “I found this piece so useful and inspiring, being someone who also chose not to follow her heart to Art College... Now I'm giving myself time to explore more creatively and KTC is really helping in this process! Thank you Helen” Your comments on my posts are much appreciated.